
Welcome to Playdate Thursday for Flying Unicorn! Hold on to your hats - it's going to be somewhat of a long post, but I will try to explain it quickly.
I am sure that if you know anything about me by now, you know I like repurposing stuff and finding strange uses for odd things. Well recently, I thought I would experiment with a way to use transparent heavy-duty cellophane, like the kind flowers come wrapped in at the grocery store. I had a bunch of the stuff from a gift basket so I thought I would give it a go. Here is my first canvas I made using it (at the bottom of the canvas.)

I was so intrigued by the texture that I thought it would be fun to make something else and show you the process.

The first thing you want to do is make sure the cellophane is transparent and also pretty thick so it will hold up. I cut it in large strips about 2 1/2 inches thick.

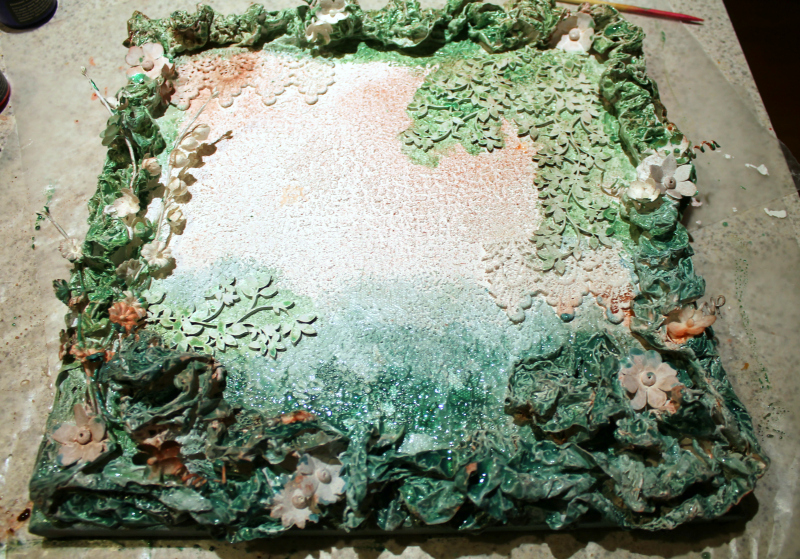
I prepped and covered my canvas using three different stencils from previous kits and Golden Gel Medium and then I added some 13 Arts Glass Microspheres and let it dry.

While the canvas was drying, I scrunched up the cellophane strips and rolled them into a ball to get them all crinkly.

Here is what they looked like before I glued them on.

The next step is to gather and scrunch the cellophane onto the canvas and adhere it with glue. I think Beacons 3 in 1 is the best for this because it is clear and it grabs quickly and makes it stay in place.

I added some more background elements like Creative Embellishment Chipboard and some Flying Unicorn Lace.

Here is where it starts getting fun. Cover all of the cellophane with gesso. You will start to notice a couple of things now. First you will see just how amazing gesso really is as it covers every nook. You will also see that if you miss an area it will have a lot of light play - it almost sparkles. This could be a good thing, but for this project I wanted everything totally covered so the color I would apply later would adhere. This step takes a little time but the end results are worth it.

Now here is the really cool part. After everything is covered with gesso, take a heat gun and slowly hover over the cellophane so that it starts to shrink up. You can control how much you want to shrink it to the canvas and in what direction you want the cellophane to curl with some practice. Be careful to not hold it in one place for too long or it will start smoking and burning (ask me how I know this.)

After I had everything the way I wanted, I added some flowers here and there.

Then I went over the whole canvas again with gesso, paying close attention to areas where the cellophane was still clear.

Then I started the process of adding color. I started out by using Lindy's Cocobean Copper for the base. Next I watered down some Silks Acrylic Glaze in Fern and Forest Green and painted the "frame" of the canvas. Just add the layers until you feel it is the way you want it but it doesn't have to be perfect.
Then I continued painting with Silks in Pink Azalea, Sky Blue, Rich Cobalt, Snapdragon, Moonbeams, Jasmine, Sunflower, and Iris Petal.

For the Kaisercraft gate, I wanted it to look slightly open so I put a strip of paper behind it and folded the overhang backwards, then I propped it up by placing a piece of cardboard between the fold. When I glued the gate onto the canvas, it remains open.

Next, I added some more flowers and some adorable little Prima fairies. The last step is to lightly highlight all the high points on the canvas with white gesso to make everything stand out.

I added a quote and here is the finished canvas.


Wishing you all a wonderful day and a very...

No comments:
Post a Comment